Setting up a replay
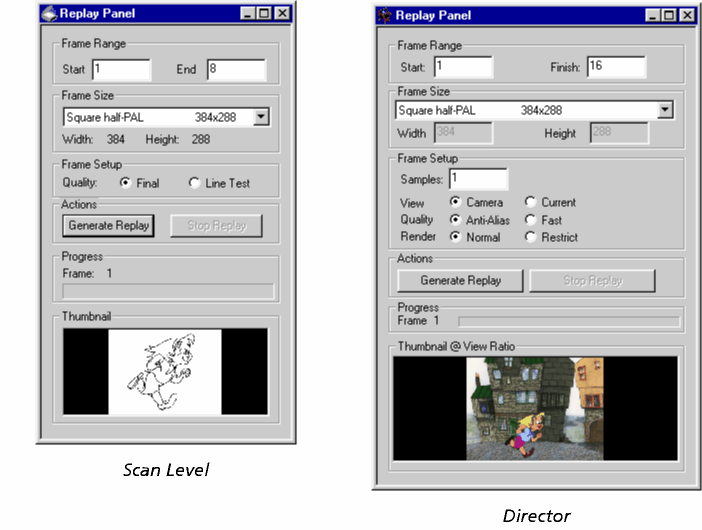
- To setup a replay, choose Tools > Replay from Scan Level or Director's menu. The Generate Replay window appears:
- Use the Frame Size section to set the size of the replay:
- Choose a preset size from the pop-up menu.
- Alternatively - for Director only - choose Custom Size from the pop-up menu, and then set the Width and Height of the replay using the sliders or by typing.
- Use the Frame Setup section to set up how the frames are generated:
- Click on one of the Quality buttons to set the quality of output. Final (Scan Level) or Anti-Alias (Director) give a higher quality replay; Line Test or Fast gives a lower quality replay, but because this is less work for the computer, the replay will generate more quickly.
- For Director only, you can also:
- Use the Sample slider to choose the rate of frame sampling you wish to use. The more often you sample the scene, the longer the replay will take to create, and the more of your computer's memory it will use.
- Click on one of the View buttons to set the view used for the replay. You can choose between the Camera view, or the Current view - which gives the same view as you're showing in Director's Drawing Window, and is useful for seeing an area in detail.
